Object Avoiding Robot
A robot that can avoid obstacles in its way when moving by sensing them with an ultrasonic distance sensor.
| Engineer | School | Area of Interest | Grade |
|---|---|---|---|
| Alan Z | Leigh | Engineering | Incoming Junior |
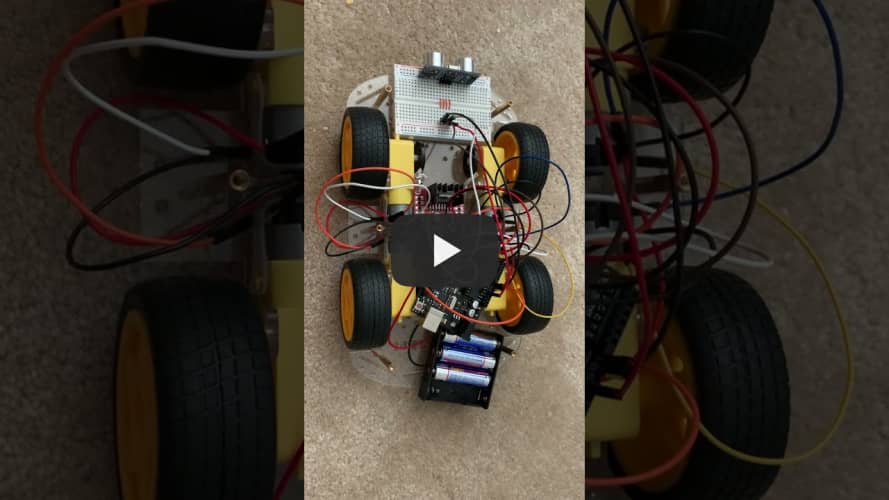
Demo Night Video
Final Milestone
My final milestone was basically finishing up the robot. I made and uploaded the completed code (shown below) to the Arduino and tested the robot in its ability to actually avoid obstacles. I also plan to make some modifications in the future, starting with some simpler ones, such as having a red LED light up whenever an obstacle is detected by the robot.
#include <AFMotor.h> //import your motor shield library
#define trigPin 12 // define the pins of your sensor
#define echoPin 13
AF_DCMotor motor1(1,MOTOR12_64KHZ); // set up motors.
AF_DCMotor motor2(2, MOTOR12_8KHZ);

// Motor A connections
int enA = 9;
int in1 = 8;
int in2 = 7;
// Motor B connections
int enB = 3;
int in3 = 5;
int in4 = 4;


void setup() {
  Serial.begin(9600); // begin serial communication
  Serial.println("Motor test!");
   pinMode(trigPin, OUTPUT);// set the trig pin to output (Send sound waves)
  pinMode(echoPin, INPUT);// set the echo pin to input (recieve sound waves)
  motor1.setSpeed(105); //set the speed of the motors, between 0-255
motor2.setSpeed(105);

// Set all the motor control pins to outputs
	pinMode(enA, OUTPUT);
	pinMode(enB, OUTPUT);
	pinMode(in1, OUTPUT);
	pinMode(in2, OUTPUT);
	pinMode(in3, OUTPUT);
	pinMode(in4, OUTPUT);

	// Turn off motors - Initial state
	digitalWrite(in1, LOW);
	digitalWrite(in2, LOW);
	digitalWrite(in3, LOW);
	digitalWrite(in4, LOW);
}

void loop() {

   long duration, distance; // start the scan
  digitalWrite(trigPin, LOW);
  delayMicroseconds(2); // delays are required for a succesful sensor operation.
  digitalWrite(trigPin, HIGH);

  delayMicroseconds(10); //this delay is required as well!
  digitalWrite(trigPin, LOW);
  duration = pulseIn(echoPin, HIGH);
  distance = (duration/2) / 29.1;// convert the distance to centimeters.
  if (distance < 25)/*if there's an obstacle 25 centimers, ahead, do the following: */ {
   Serial.println ("Close Obstacle detected!" );
Serial.println ("Obstacle Details:");
Serial.print ("Distance From Robot is " );
Serial.print ( distance);
Serial.print ( " CM!");// print out the distance in centimeters.

Serial.println (" The obstacle is declared a threat due to close distance. ");
Serial.println (" Turning !");
    motor1.run(FORWARD);  // Turn as long as there's an obstacle ahead.
    motor2.run (BACKWARD);
    analogWrite(enA, 200);
    analogWrite(enB, 200);
    digitalWrite(in1, HIGH);
    digitalWrite(in2, LOW);
    digitalWrite(in3, HIGH);
    digitalWrite(in4, LOW);
}
  else {
   Serial.println ("No obstacle detected. going forward");
   delay (15);
   motor1.run(FORWARD); //if there's no obstacle ahead, Go Forward!
    motor2.run(FORWARD);
    analogWrite(enA, 100);
    analogWrite(enB, 0);
    digitalWrite(in1, LOW);
    digitalWrite(in2, HIGH);
    digitalWrite(in3, HIGH);
    digitalWrite(in4, LOW);
  }
}
Second Milestone
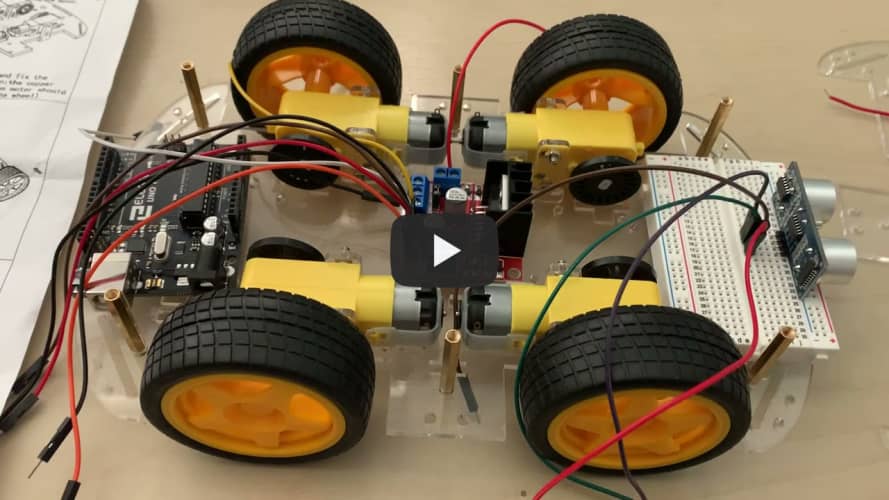
My second milestone was building the chassis, which included the motors and wheels. I also wired up the L298N motor driver with the motors and the Arduino. This was difficult, particularly wiring the motor driver and motors together, because the wires tended to slip loose and fall out. Then, I uploaded some code to test the motors’ basic functions. The code I used to test the motors is shown below.
// Motor A connections
int enA = 9;
int in1 = 8;
int in2 = 7;
// Motor B connections
int enB = 3;
int in3 = 5;
int in4 = 4;

void setup() {
	// Set all the motor control pins to outputs
	pinMode(enA, OUTPUT);
	pinMode(enB, OUTPUT);
	pinMode(in1, OUTPUT);
	pinMode(in2, OUTPUT);
	pinMode(in3, OUTPUT);
	pinMode(in4, OUTPUT);

	// Turn off motors - Initial state
	digitalWrite(in1, LOW);
	digitalWrite(in2, LOW);
	digitalWrite(in3, LOW);
	digitalWrite(in4, LOW);
}

void loop() {
	directionControl();
	delay(1000);
//	speedControl();
	delay(1000);
}


// This function lets you control spinning direction of motors
void directionControl() {
	// Set motors to maximum speed
	// For PWM maximum possible values are 0 to 255
	analogWrite(enA, 255);
	analogWrite(enB, 255);

	// Turn on motor A & B
	digitalWrite(in1, HIGH);
	digitalWrite(in2, LOW);
	digitalWrite(in3, LOW);
	digitalWrite(in4, HIGH);
	delay(2000);

	// Now change motor directions
	digitalWrite(in1, LOW);
	digitalWrite(in2, HIGH);
	digitalWrite(in3, HIGH);
	digitalWrite(in4, LOW);
	delay(2000);

	// Turn off motors
	digitalWrite(in1, LOW);
	digitalWrite(in2, LOW);
	digitalWrite(in3, LOW);
	digitalWrite(in4, LOW);
}

// This function lets you control speed of the motors
void speedControl() {
	// Turn on motors
	digitalWrite(in1, LOW);
	digitalWrite(in2, HIGH);
	digitalWrite(in3, HIGH);
	digitalWrite(in4, LOW);

	// Accelerate from zero to maximum speed
	for (int i = 0; i < 256; i++) {
		analogWrite(enA, i);
		analogWrite(enB, i);
		delay(20);
	}

	// Decelerate from maximum speed to zero
	for (int i = 255; i >= 0; --i) {
		analogWrite(enA, i);
		analogWrite(enB, i);
		delay(20);
	}

	// Now turn off motors
	digitalWrite(in1, LOW);
	digitalWrite(in2, LOW);
	digitalWrite(in3, LOW);
	digitalWrite(in4, LOW);
}
First Milestone
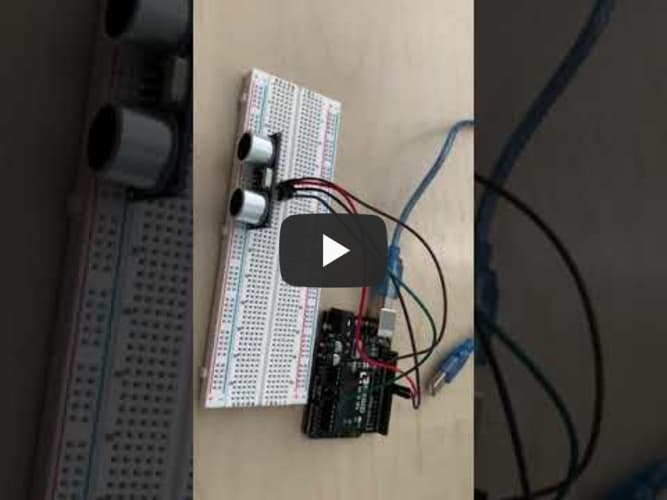
My first milestone was setting up the ultrasonic distance sensor and wiring it up with the Arduino and breadboard. First, I had to find a way to upload code to the Arduino with my Chromebook, so I decided to use Arduino Cloud. I also had to figure out how to code the Arduino so that I could see the distance when it ran. Eventually, I was able to make the ultrasonic distance sensor work properly. The distance in centimeters was printed out on my screen with each interval of time that passed. The code I used is shown below. The interval of time between each printout is 1000 millseconds, or 1 second.
const int trigPin = 9;
const int echoPin = 10;
float duration, distance;

void setup() {
    pinMode(trigPin, OUTPUT);
    pinMode(echoPin, INPUT);
    Serial.begin(9600);
}

void loop() {
 digitalWrite(trigPin, LOW);
 delayMicroseconds(2);
 digitalWrite(trigPin, HIGH);
 delayMicroseconds(10);
 digitalWrite(trigPin, LOW);
 duration = pulseIn(echoPin, HIGH);
 distance = (duration*.0343)/2;
 Serial.print("Distance: ");
 Serial.println(distance);
 delay(1000);
}


